- Most common indication we see for CTA chest is for further evaluation after dilated ascending aorta noted on Echo.
- CT is gold-standard to measure aortic size within the chest
- Load images: Saghir’s preferred method to load CT images is to click
Loadand use theBypassmodule.- For 4D, his go-to is
Angio(underOthertab) - The exception is
TAVRandTMVRfor each corresponding study
- For 4D, his go-to is
Load Images
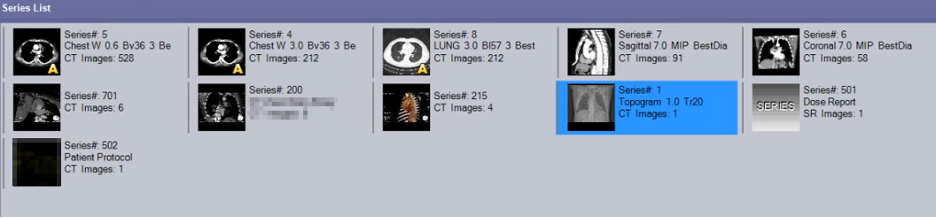
- You will see several
Seriesavailable for your review, which are just different reconstructions. - Step 1: You will begin by first looking at the topogram.
- Next, you’ll look first at the
Seriesthat generally has the most images, e.g. the example above would beSeries#: 5that has 528 images. This contains the most images because it has the thinnest slice thickness.- For this Series, you’ll notice the second line reads
Chest W 0.6…the0.6indicates that it is 0.6 mm, which is the thinnest slice we currently have available.
- For this Series, you’ll notice the second line reads
- Adam’s preferred workflow is
Right Click→ SelectABDOMEN→ SelectCTA Runoff- 📝 You may then be asked if you need to
Clear the output panel now?, and you will selectYes. 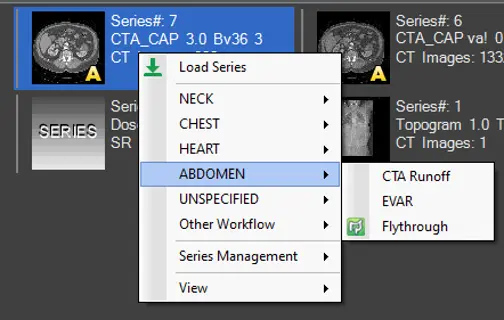
- 📝 You may then be asked if you need to
- For 4D studies, you’ll
Right Click→ SelectHEART→ SelectCardiac- Iyer like’s to use
Other Workflow→Cardiac Measurement
- Iyer like’s to use
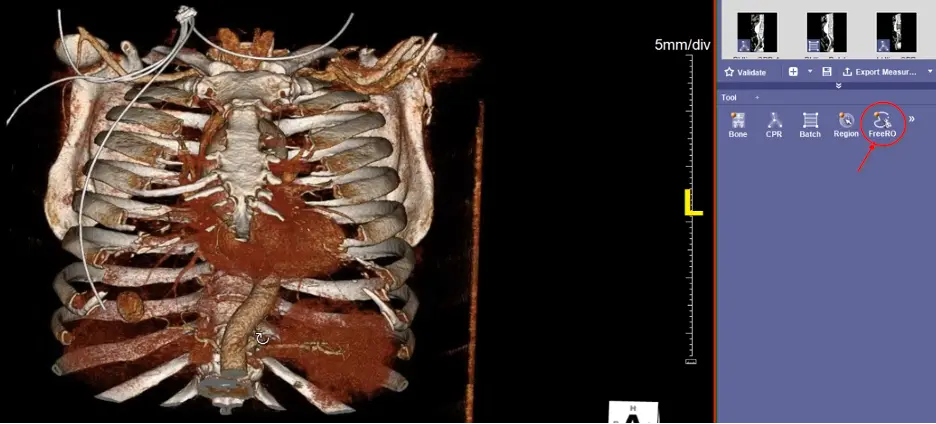
3D View
- Double click on the 3D Reconstruction image to open it up.
- Change your layering by holding the Left- and Right-click buttons down on your mouse and dragging up/down.
- To remove ribs, wires, etc. click the
FreeRObutton (as shown below). Once inFreeROmode, you will hold down theShiftbutton and select the regions you’d like to remove. - 📝 When you have a nice image you’d like to stash for later review (e.g., to share/discuss with attending), Adam encourages us to Right-click and select
Capture, which stores these cuts in theSeries List.
Axial View
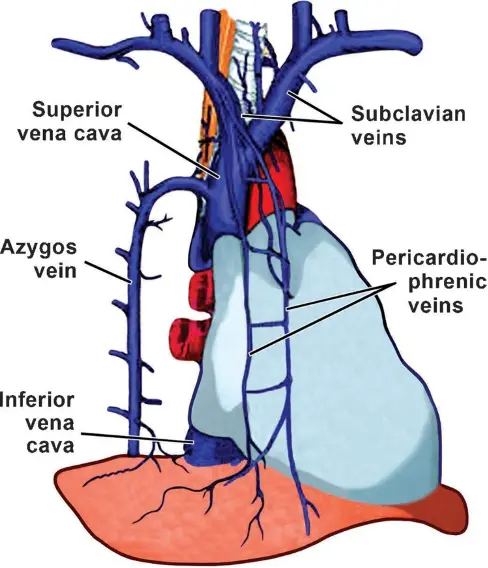
- Adam likes to start with examining the venous system, which is where the contrast starts.
- Scrolling down to evaluate the venous system
- Any persistent left-sided SVC?
- Ensure L and R brachiocephalic vv. drains into the SVC as usual
- As you scroll down further, you’ll see the azygous vein coming off the SVC posteriorly.
- The SVC will drop into the Right atrium
- Scrolling down from the RA will reveal the IVC
- Evaluate the pulmonary veins
- Look out to see if there is partial anomalous pulmonary venous return (PAPVR).
- If you can count 4 major pulmonary veins sticking out, you can be pretty confident there is no PAPVR.
- RV enlargement may prompt you to look more closely.
- Evaluate the left atrial appendage
- You want to look to make sure it fills completely with contrast.
- If it doesn’t fill completely, it could be suggestive of a thrombus! However, sometimes it won’t fill completely because it takes a while for contrast to fill. In those cases, we’ll run a delayed series. This involves scanning the LAA 30 seconds later to see if the contrast doesn’t actually fill. If these delayed series are present in our system, you’ll see them available in the
Series Listand they’ll be marked Delay.- While we use 30 seconds, other institutions use different times to reassess for delayed contrast filling to r/o thrombus.
- Nice meta-analysis demonstrating the excellent diagnostic accuracy of CT with delayed imaging for detection of LA/LAA thrombus here.
- 📝 Recall, TEE is considered the gold standard for detect LA/LAA thrombus.
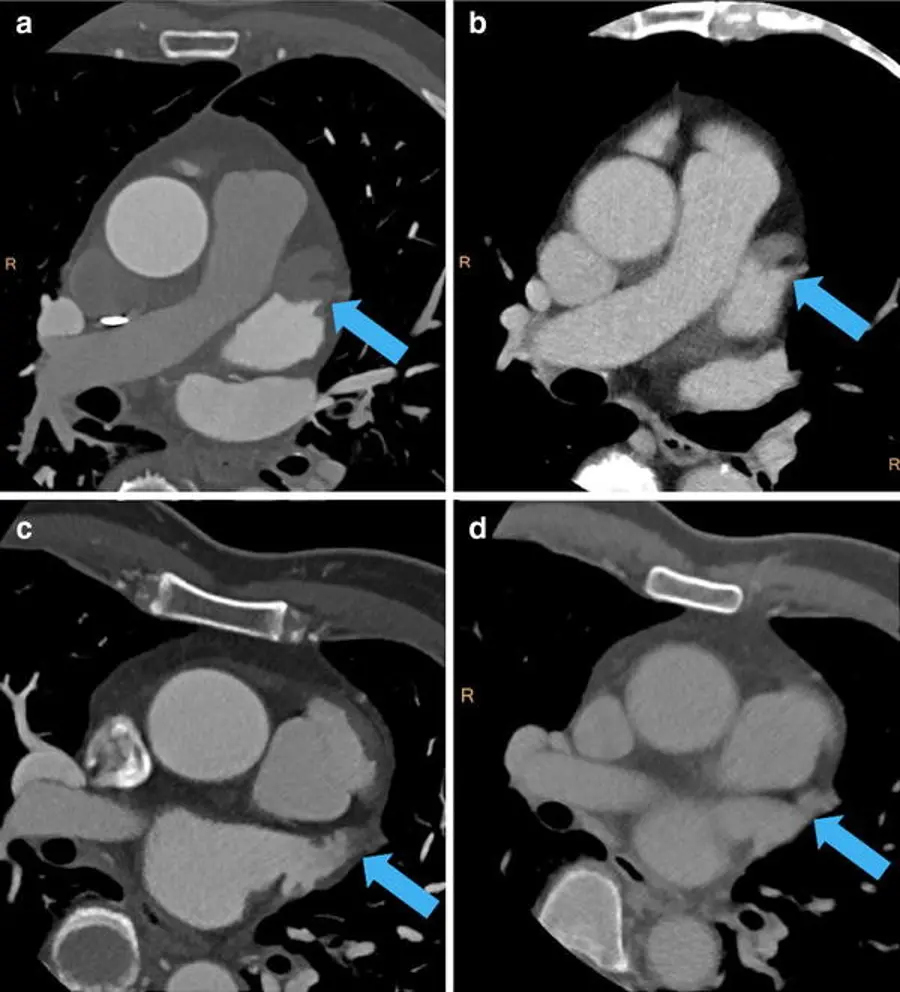
- Arrow highlights LAA thrombus
- Evaluate the Pulmonary artery
- Push down the
Dbutton and drag your cursor to measure the diameter. You will generally want <32 mm in size for a “normal” measurement. I’ve also heard anything >28 mm
- Push down the
- Look for MAC or AV calcification
- Look at the coronary artery anatomy
- Dedicated studies to evaluate coronary artery anatomy often will involve the use of BB, nitroglycerin and optimal contrast timing to appropriately assess the coronary arteries. This is not the case for CTA chest, so you’ll have to take things with a grain of salt.
- Make sure there are normal origins, make note of CAC (if any).
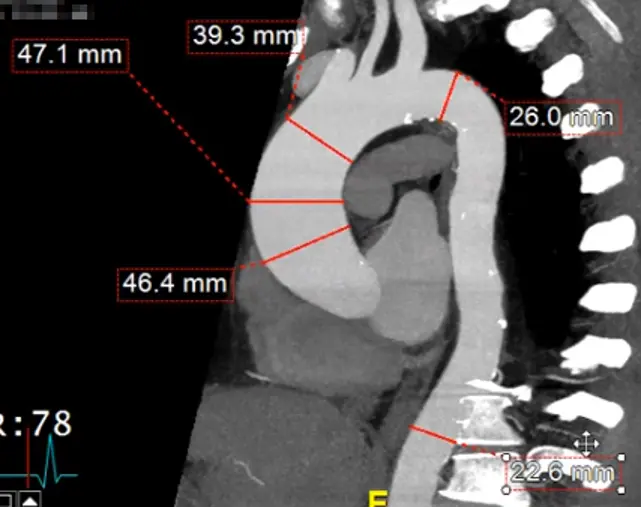
Measuring Aortic Sizes
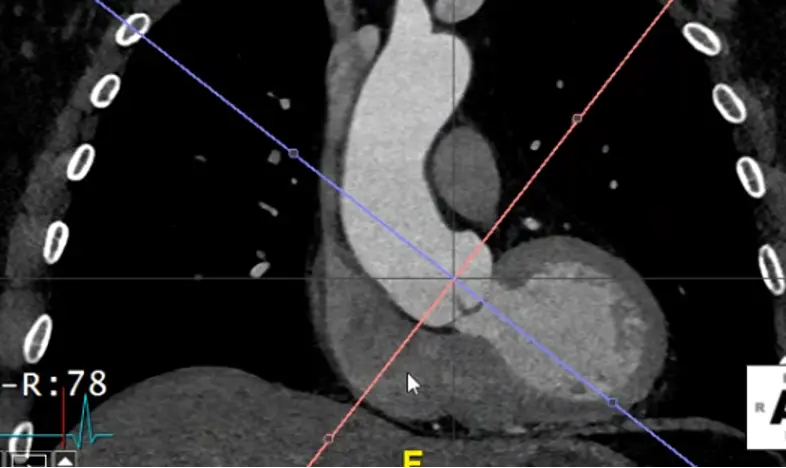
- Start at the sinuses of Valsalva
- Hit
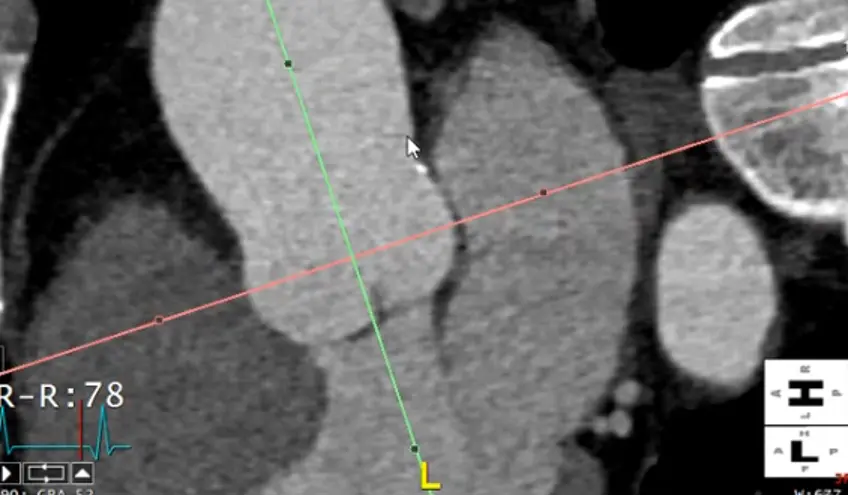
Xto grab your cross-hairs. You will drag the cross hairs to the middle of the sinuses of Valsalva in the axial view window. - In your coronal view window, there is a pink/red line with a small circle. Drag this circle to line up the pink/red line to be perpendicular to the wall of the sinus of Valsalva. The blue/purple line should be in the center of the long-axis of the aorta at the sinus of Valsalva.
- Similarly for your sagittal view, you will want your pink/red line to be perpendicular to the sinuses of Valsalva. You will also want your green line to be in the center of the long-axis of the aorta at the sinus of Valsalva.
- Once you’ve lined things up, in your axial view window you will now have what is called a “true short axis” of the aorta at that level.
- Slide up and down to evaluate the AV anatomy. You will be able to determine if it is tricuspid, bicuspid, etc.
- Recall, the RCC is going to be the most anterior cusp. HINT: There is an ‘A’ (for anterior) at the top of the axial window and a ‘P’ (for posterior) at the bottom to help orient you.
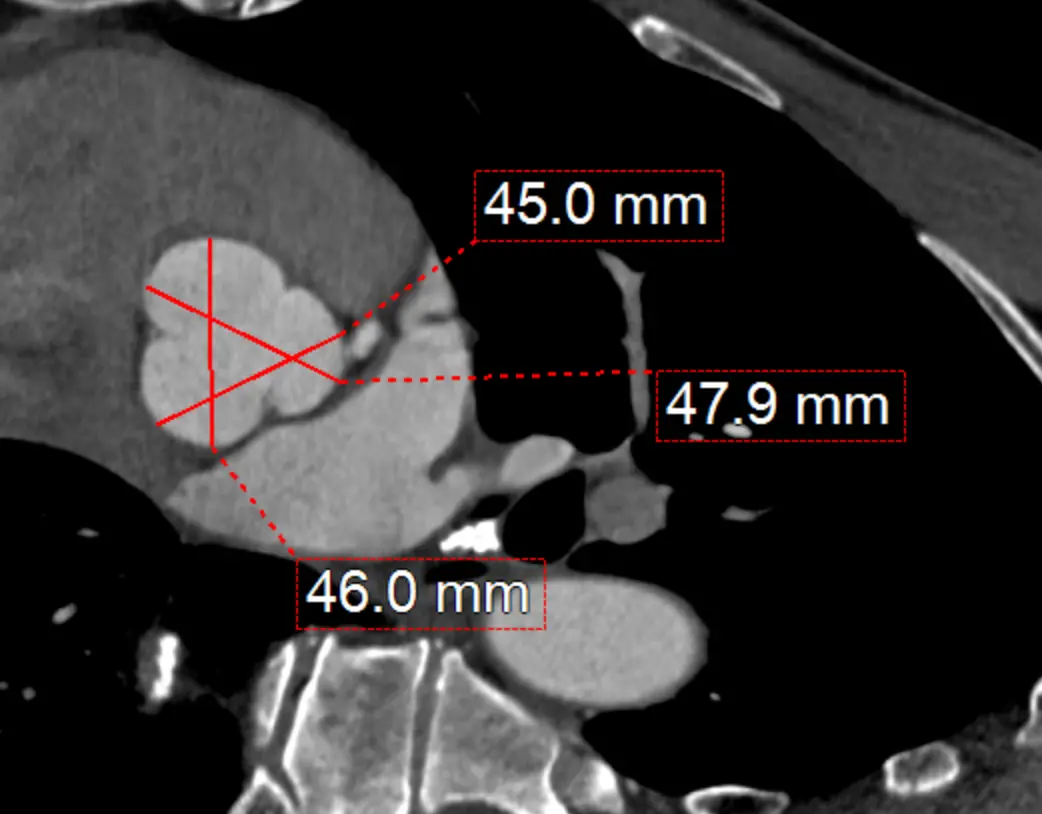
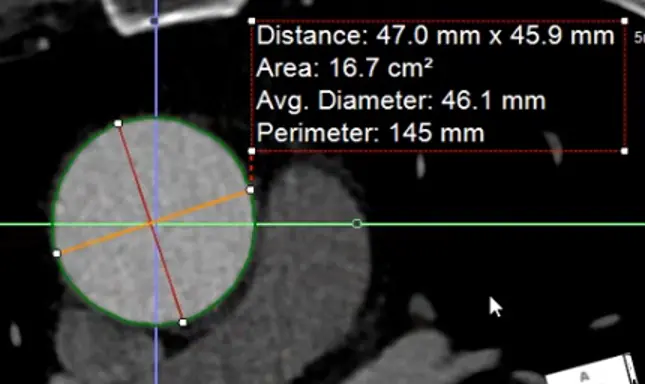
Measure at sinuses of Valsalva
- Measure aortic root diameter at the sinuses of Valsalva on CT
- Drag the lines until you see the widest section in the coronal and sagittal planes
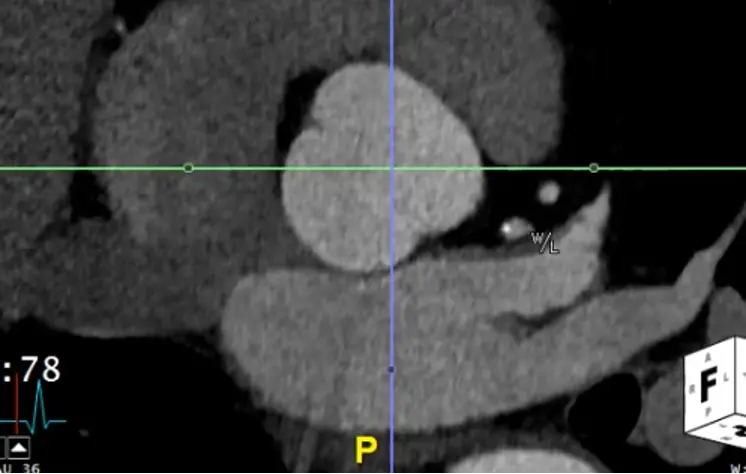
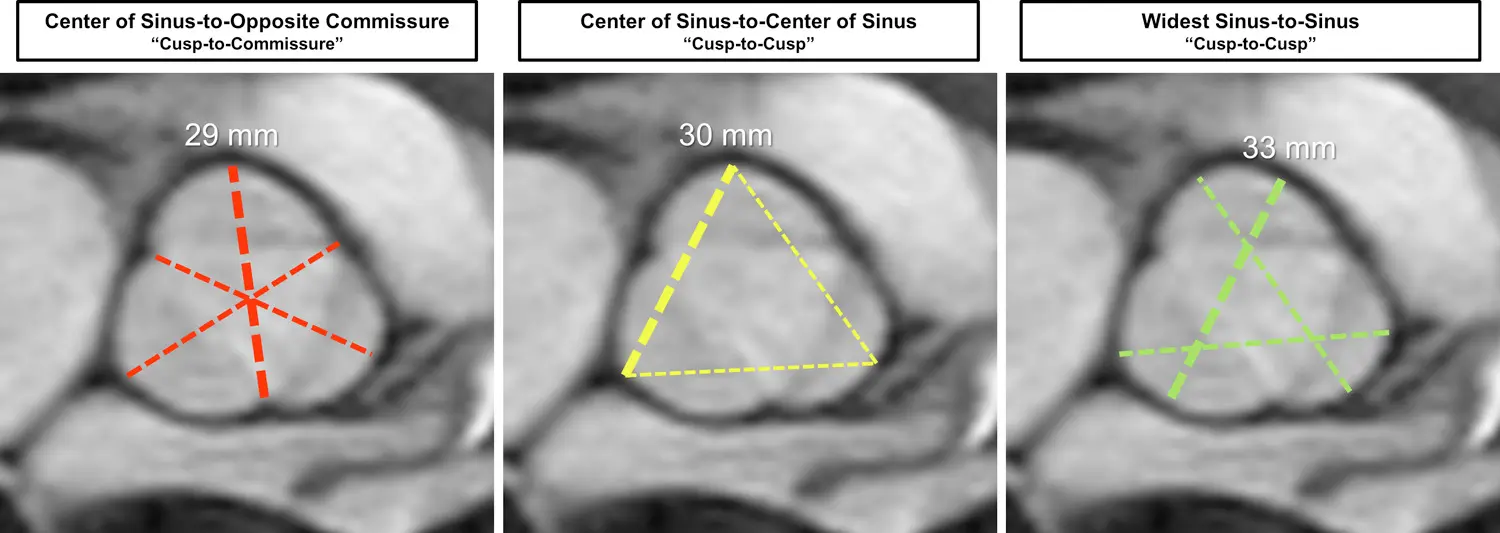
- Now in your axial view (SAX), you will measure commissure to sinus.
- RCC measurement:
- Normally, this will be from the commissure between the LCC and NCC
- You will then drag up to the sinus of the RCC
- NCC measurement:
- LCC and RCC commissure → sinus of NCC
- LCC measurement:
- RCC and NCC commissure → sinus of LCC
- RCC measurement:
- You can also measure from sinus-to-sinus
Sinus-to-sinus versus sinus-to-commissure1
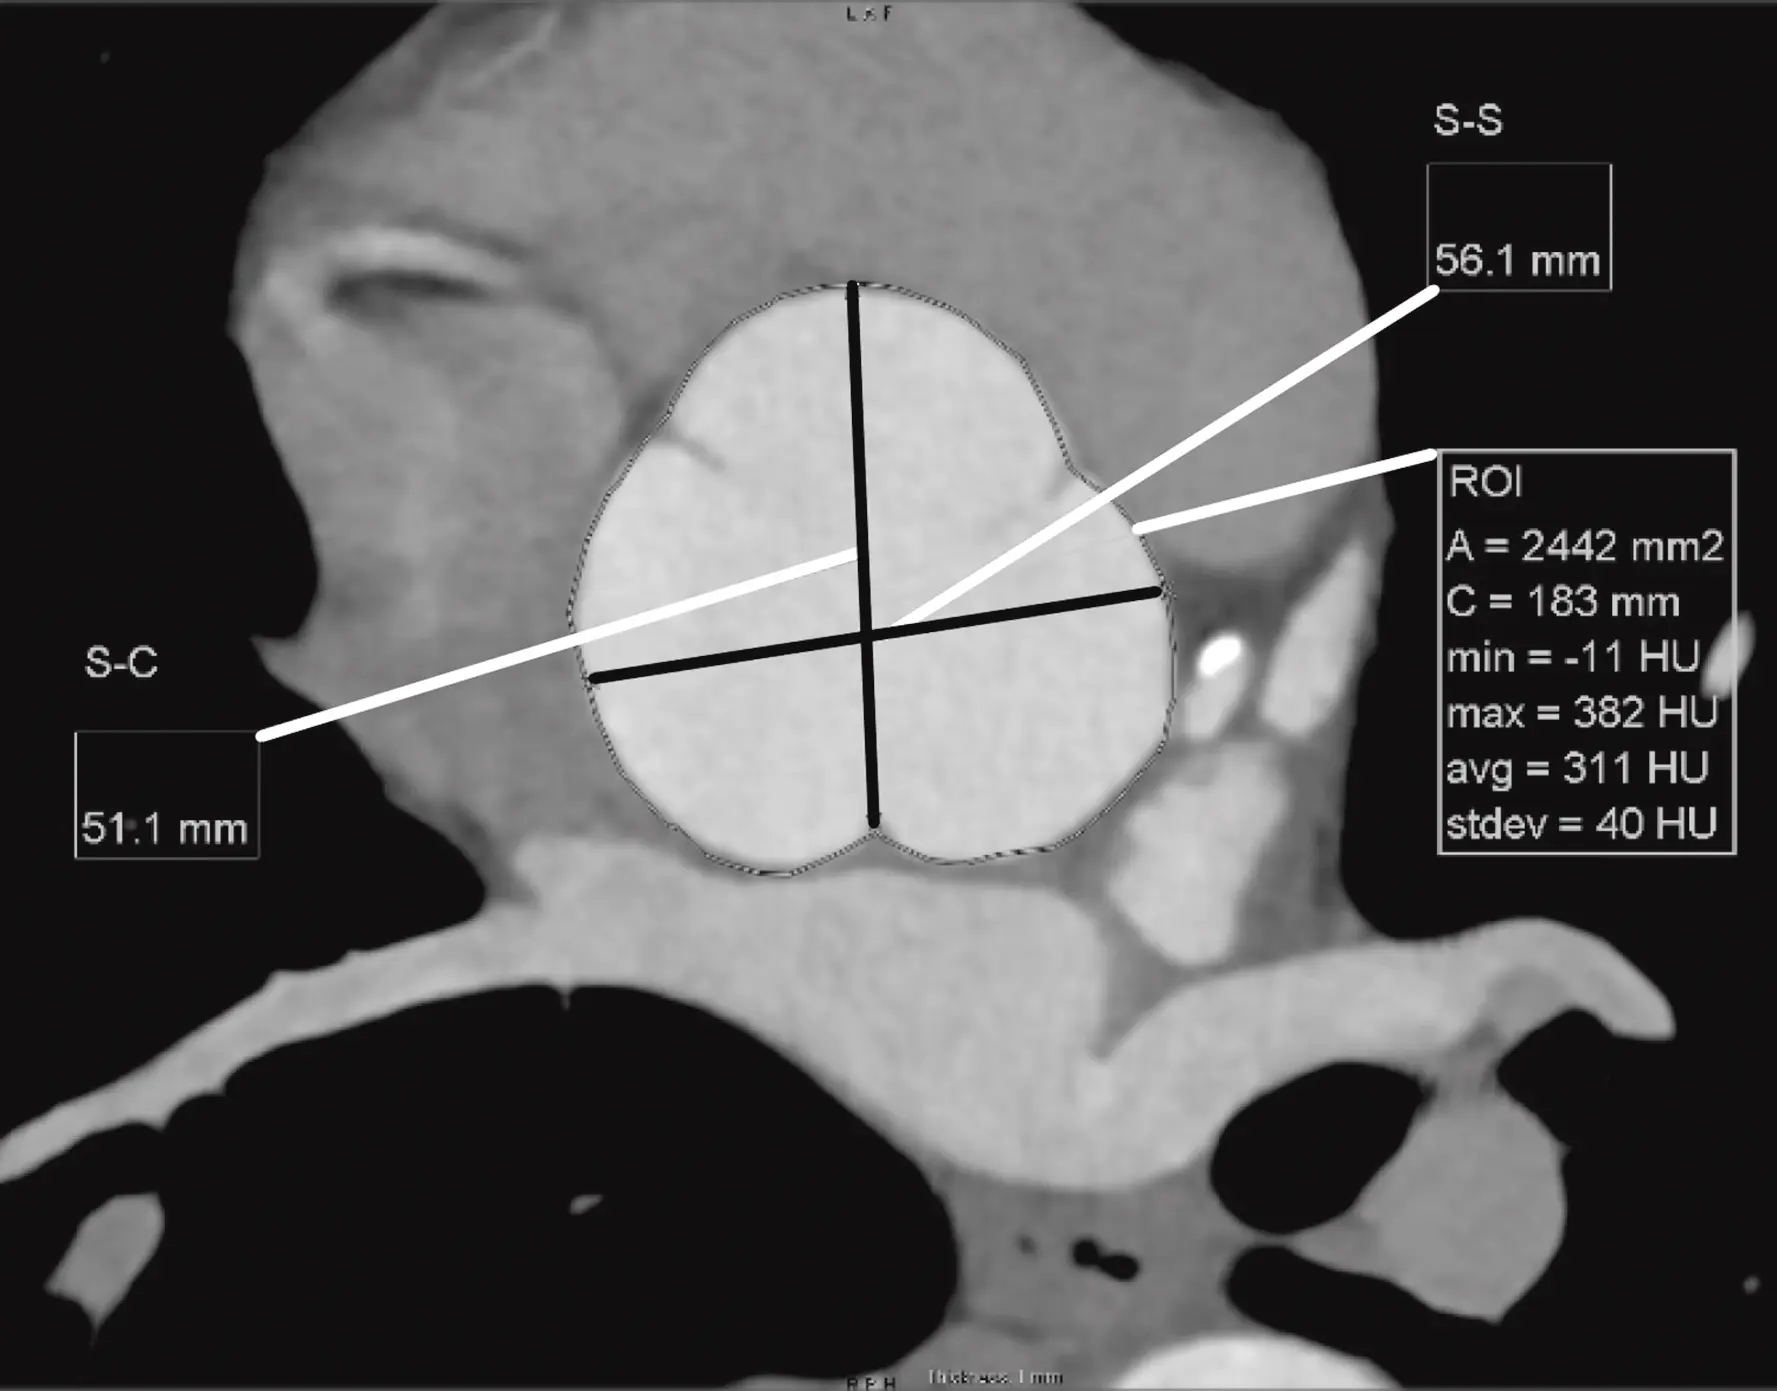
Figure source: 2
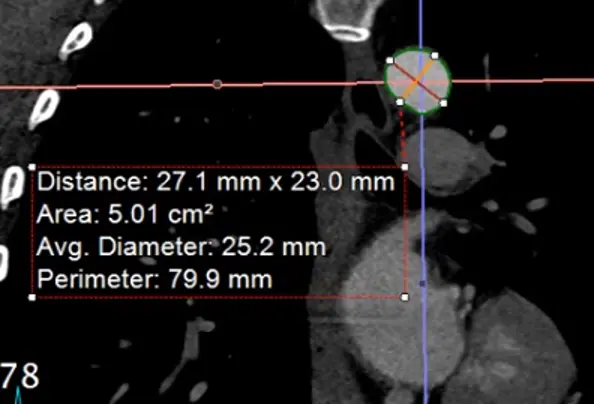
Measure at Sinotubular Junction
- Drag the lines to the sinotubular junction, i.e. where the sinuses and the tubule combine
- In the axial view, the “true short axis” should be pretty close to appearing like a circle.
- 📝 Hit
Xto get the cross-hairs off.
- 📝 Hit
- Hit
Alt+Dto automagically measure - Right click and Capture to stash the image and measurement
Measure at the widest segment
- The widest segment (typically) is at the mid-aorta at the level of the main pulmonary artery (MPA)
- Same as above, drag your crosshairs to the desired level and adjust to be perpendicular to the artery wall in the coronal and sagittal views. Line up the blue/green line to be in the center/parallel to the long axis of the aorta at that level.
- In the axial view, the “true short axis” should appear like a circle
Alt+Dto auto-measure- Right click and
Captureto add this to theSeries List
Measure the proximal descending thoracic aorta
- Note: the proximal descending thoracic aorta begins immediately distal to the great vessels (not when the aorta physically starts descending), i.e. after the takeoff of the L subclavian artery
- Line things up in two of the views. In the example Adam showed, he lined it up in the axial and sagittal views and made the measurement in the coronal view.
- Note: the shape of the proximal descending thoracic aorta will not be perfectly circular.
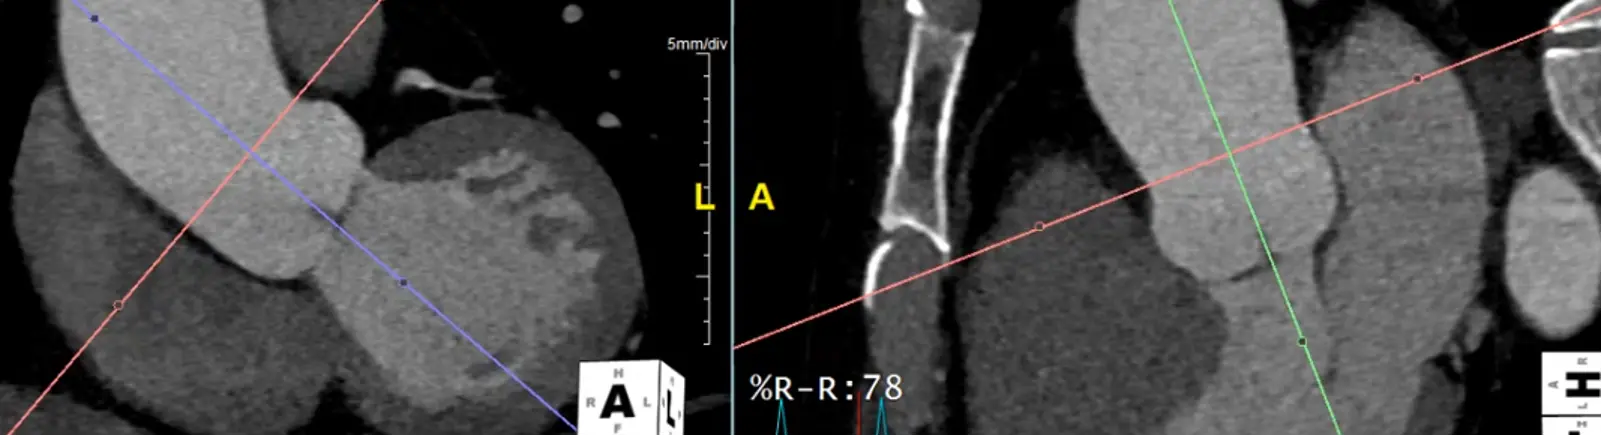
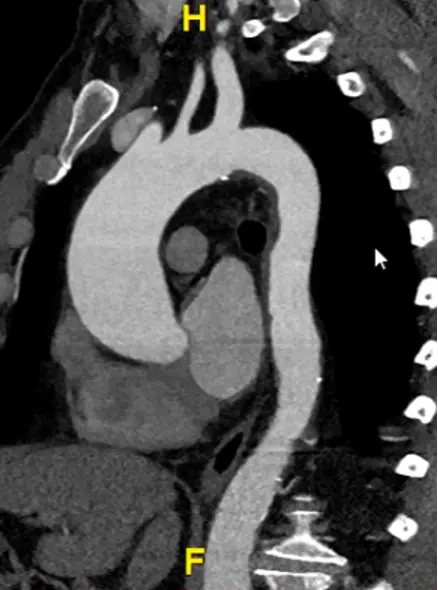
Measure aorta using “candy cane” view
- Rotate your cross hairs so you are cutting through both the ascending and descending thoracic aorta.
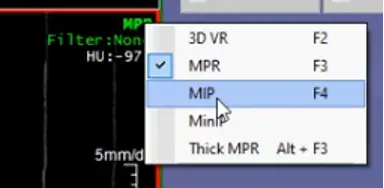
- Last step is to click the
MPRbutton at the top right and change it toMIP - Hit
Ctrl, hit the button down and drag sideways, you can increase/decrease the slab thickness. For example, this may allow you to capture the entire thickness of the aorta in different planes by manipulating the slab thickness. - Hit
Dto make measurements at different levels of the aorta. Provides a sanity check to make sure you didn’t miss a larger/wider part of the aorta. - Right-click and select ‘Capture’ to store this image with your measurements.
Footnotes
-
Isselbacher EM, Preventza O, Hamilton Black J 3rd, Augoustides JG, Beck AW, Bolen MA, Braverman AC, Bray BE, Brown-Zimmerman MM, Chen EP, Collins TJ, DeAnda A Jr, Fanola CL, Girardi LN, Hicks CW, Hui DS, Schuyler Jones W, Kalahasti V, Kim KM, Milewicz DM, Oderich GS, Ogbechie L, Promes SB, Gyang Ross E, Schermerhorn ML, Singleton Times S, Tseng EE, Wang GJ, Woo YJ; Peer Review Committee Members. 2022 ACC/AHA Guideline for the Diagnosis and Management of Aortic Disease: A Report of the American Heart Association/American College of Cardiology Joint Committee on Clinical Practice Guidelines. Circulation. 2022 Dec 13;146(24):e334-e482. doi: 10.1161/CIR.0000000000001106. Epub 2022 Nov 2. PMID: 36322642; PMCID: PMC9876736. ↩
-
Tretter JT, Spicer DE, Franklin RCG, Béland MJ, Aiello VD, Cook AC, Crucean A, Loomba RS, Yoo SJ, Quintessenza JA, Tchervenkov CI, Jacobs JP, Najm HK, Anderson RH. Expert Consensus Statement: Anatomy, Imaging, and Nomenclature of Congenital Aortic Root Malformations. Ann Thorac Surg. 2023 Jul;116(1):6-16. doi: 10.1016/j.athoracsur.2023.03.023. Epub 2023 Jun 8. PMID: 37294261. ↩